

I'm b-a-a-a-a-ck - this time with a quick and easy (and totally adorable) project that you can use for an assortment of homemade gifts and goodies - for a friend, a favorite teacher, or even as a birthday gift for hubby! That's my guy to the right, by the way, when he was a precocious 11 year old. Come to think of it, he's still a precocious 11 year old, he just has an additional forty-something years added to his body!
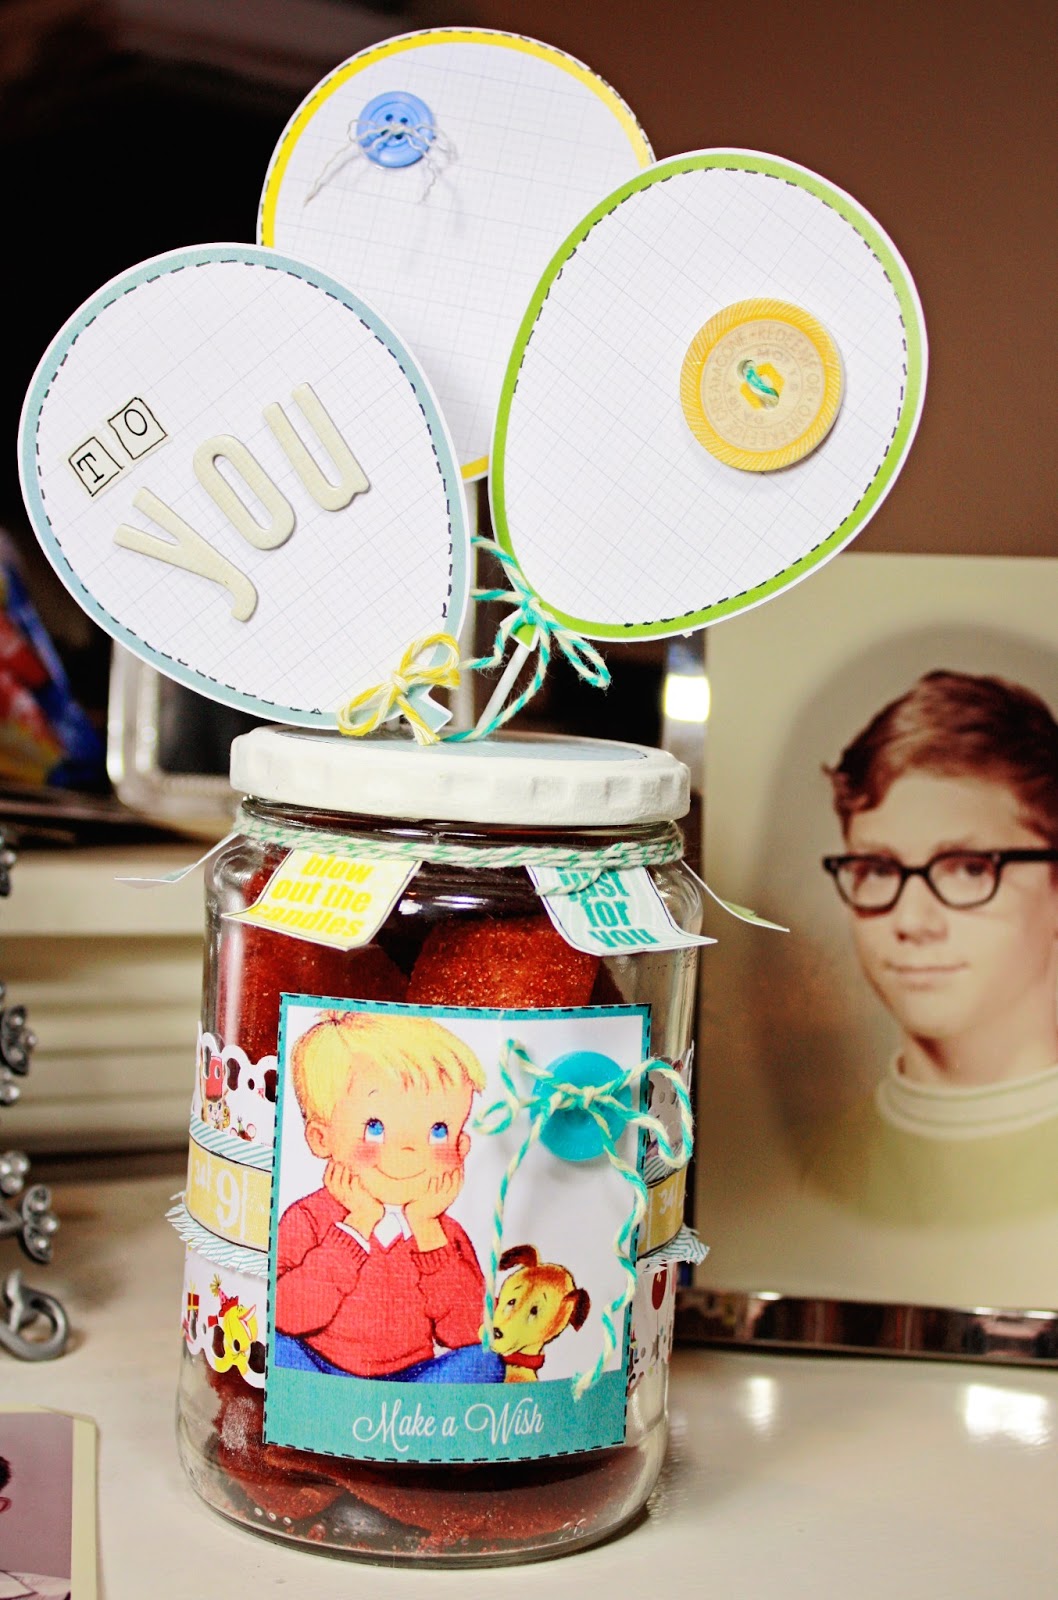
I created this project for PRETTY LITTLE STUDIO, using their fantabulous Birthday Cake Collection, as part of this week's OOTB Challenge. It seems to be one of my overall favorite collections, with it's happy, brightly colored papers and tags. My jar started out as a smelly old pickle jar (that I washed thoroughly, just in case you are wondering) that the Hubster (who loves all things pickled and smelly) had recently emptied out - and by emptied out, I mean he consumed a little bit of hamburger smothered in no less than half a jar of pickles! So, it was only fitting that I converted that particular jar into a birthday gift for him.

My 8x8 paper wasn't quite wide enough to wrap all the way around my jar, so I cheated. I cut two pieces and glued them together matching the patterns up at the connecting seam as much as possible. My base paper was cut using my Silhouette Cameo. I cut out the ruler from one of my sheets and glued it to a slightly wider blue base, which I then cut with scissors along the bottom to make a fringe. Once everything was glued to my jar, I added this adorable "Make a Wish" Polaroid Diecut to the front using pop-dots for a little extra dimension. A button with a little bit of twine glued to the front and the base of my jar was almost complete.
My next step was to add my sentiment tags around the neck of the jar. I adhered them, evenly spaced, to the neck of the jar and simply wrapped a piece of baker's twine around everything a few times.
My last step was to decorate the lid.

First, I painted the top white. After it dried, I traced out the circle onto a piece of my paper, which I then cut out and glued to the lid. I sneaked into the garage, where I found my husband's drill - just sitting there, looking unused and unloved. I drilled three holes into the lid of my jar, using the smallest bit I could find. Then I simply put a toothpick through each hole and glued a balloon journaling tag to each toothpick. Note: I added Glossy Accents to each hole before inserting my toothpicks. Because Glossy Accents hardens to a cement-like consistency, there was no chance my toothpick-based balloons would come undone - something that is very important since the balloons are on a functional lid which will be repeatedly taken off and put back on to get to the treats inside, if I know my husband! A little more baker's twine, a couple of buttons, a few letters, and I was done! The only thing better than a project coming together with no hiccups is a project that quickly comes together with no hiccups. Much of that was due to my wonderfully coordinated PRETTY LITTLE STUDIO supplies, which all seem to go together perfectly!
And now that it is finished and was presented with much fanfare to my guy for his birthday, I can tell you that Hubsy LOVES his treat jar! Okay, maybe he really just loves the goodies inside the jar, but he is smart enough to make the appropriate appreciative sounds about the jar itself. *smile*
To view this week's inspiration and the other fantastic projects completed by our Design Team, head over to the Pretty Little Studio BLOG. You are going to LOVE what you see - I just know it!
No comments:
Post a Comment