Showing posts with label lori whitlock. Show all posts

Wednesday, August 7, 2013

Nature Walk Pocket Mini

 
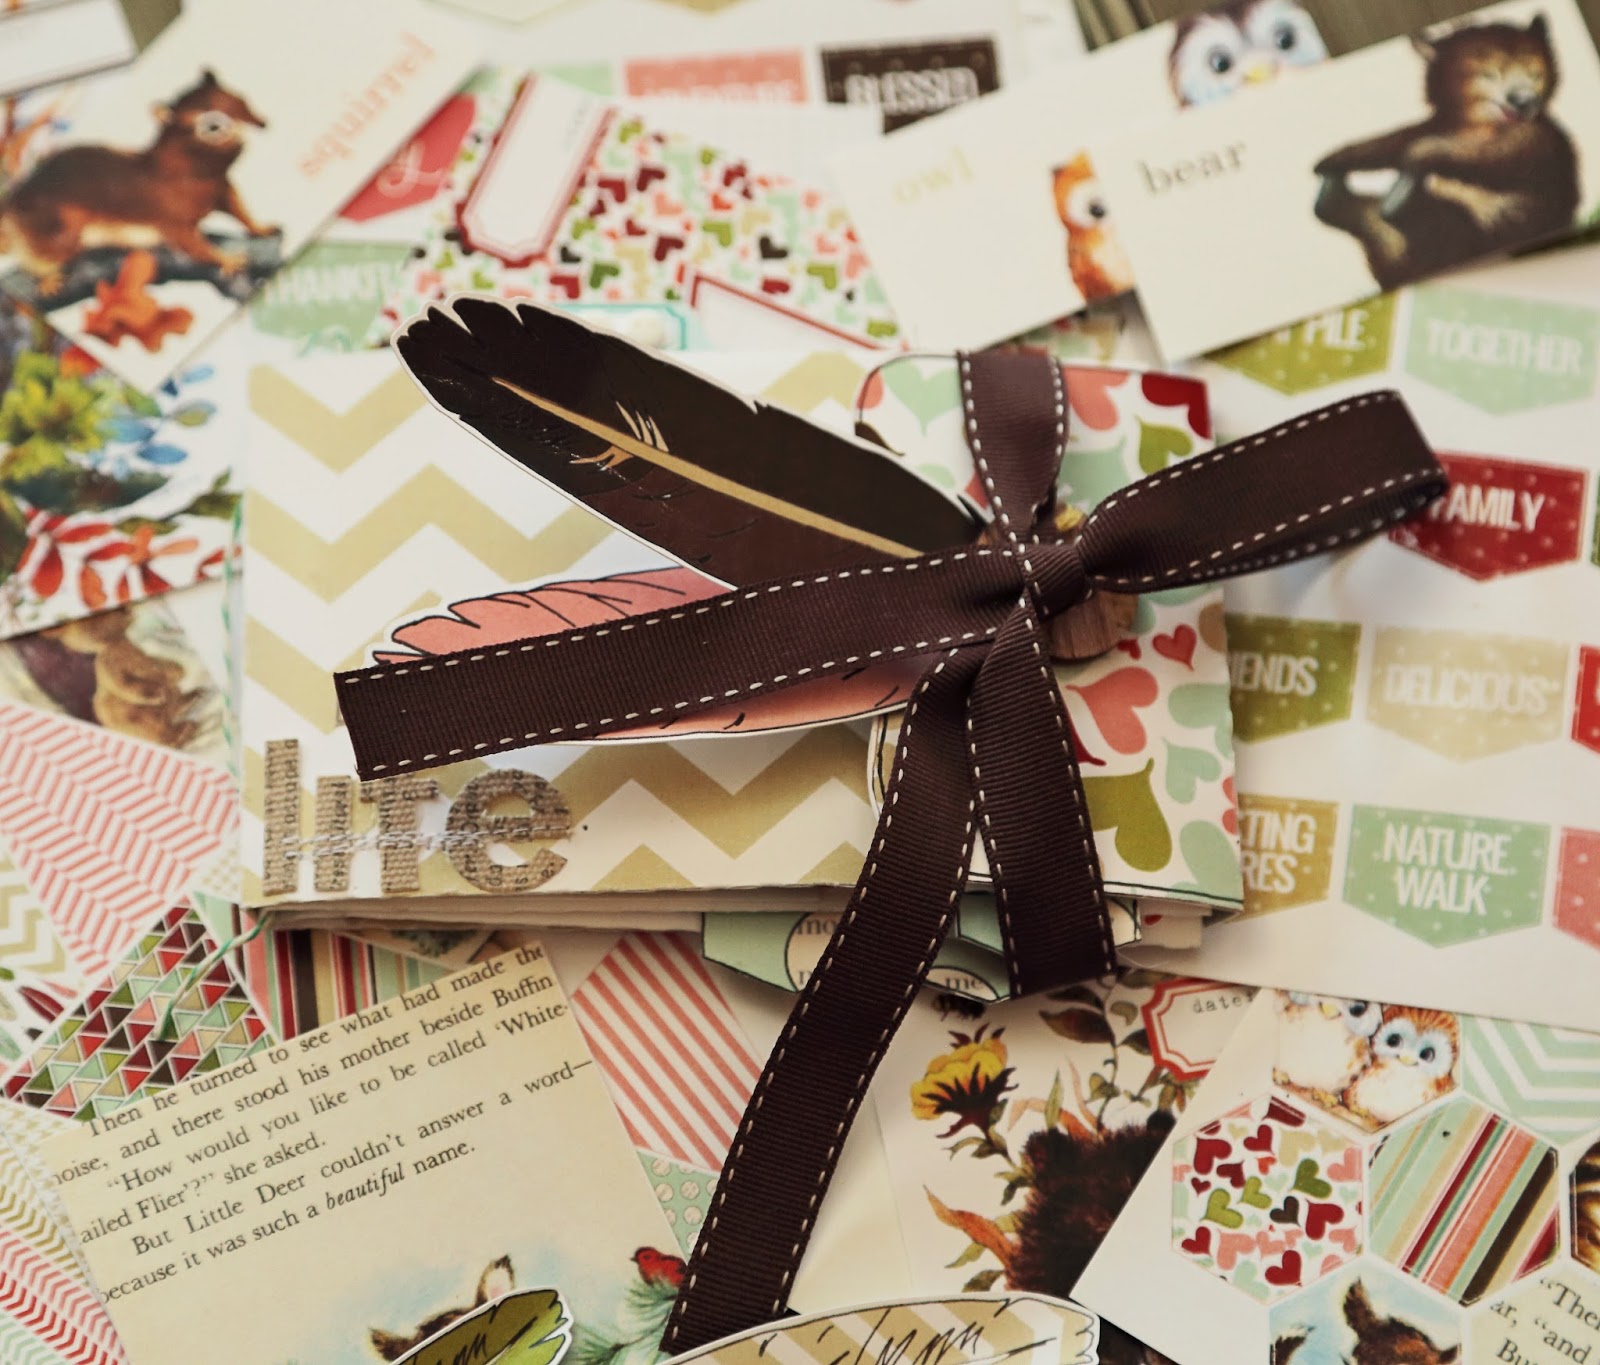
I made this sweet little pocket mini album using my Silhouette Cameo and a Silhouette cutting file by Lori Whitlock found HERE.  My inspiration?  It was the PRETTY LITTLE STUDIO Nature Walk Collection.  This collection's mix of papers in my favorite patterns and some of the cutest die-cuts and journaling tags I have ever seen had me chomping at the bit to create something that would really showcase them.  And I think this mini fits that bill perfectly.  It's tiny but it makes a B-I-G statement!


See that sweet little "love" tag? It's part of a sheet of stickers that really got the creative part of my brain jump-started.  In my whole conversion of the walk-in closet into my personal scrappy mecca, I came across a box containing quite a few random extra photos I had saved that tied in perfectly with what I call the Nature Walk "word association" stickers.  With my Silhouette doing all the hard work in the actual making of the mini album, all that was left for me was to get out my scissors and glue and start playing! 


I adhered these stickers that extend down from the mini to a sheet of my patterned paper and cut them out.  And since I did NOT have enough forethought to sew the tag onto my mini before I assembled the pocket, I simply sewed across the top of the sticker and glued it to my album page.  It looks like it is sewn to the page, and that is all that matters!

What does the number 10 stand for, you ask?  That is the number our his, mine, ours family has expanded to (not counting the newest generation that has come along).  Luckily, all but two of our birdies have feathered their own little nests and  are self-sufficient - except occasionally when they hear something is being cooked on the grill or in the oven...
 
Here is the tag that features our crazy family of 10:


But I'm jumping ahead...
 
I love this picture of Hunter from last year's vacation, and I love it even more against a simple white background with my PLS bunting flags accenting the page.  And, yep, there's another word sticker - sewn to the picture and then stapled for good measure! 
 
The journaling tags in the Nature Walk Collection fit perfectly in the pockets of my mini.  Because I was feeling extra creative, I decided to try my hand at making a few journaling tags and embellishing the pre-made ones, too.

 
And, whoo says the back of the tag can't be cute? LOL - see what I did there? Who-whoo.  Yes, I crack myself up.
 
 
My Pretty Little Studio papers cut so well in my Cameo. And, look, there are some more word tags - and the sweetest little deer diecut ever! 


And speaking of die cuts, I had to find some excuse to use this one on a page...

 
How does a rabbit fit in with football?  Well, ummm, see....when you play football, you have to run incredibly fast with the ball to score a touchdown.  Annnndddd - wait for it - rabbits also run fast.  There you have it - a connection that's as obvious as the nose on your face. Duh!
 
And now that I have cleared the rabbit/football connection up for you, I am out of here for the day!  If you want to see my mini featured at its "official" home - please check out the PRETTY LITTLE STUDIO BLOG!  And leave a comment letting me know what you think.  I would love to hear from you!
 
Until next time, happy scrapping!!!

Tuesday, December 4, 2012

Practical Scrappers - Last Minute Gift Idea

I'm up at PRACTICAL SCRAPPERS today with a fun little last minute gift idea that will keep you out of the crazy parking lots and in your craft room - for a completely legitimate goodwill-to-your-fellow-man reason. 

I love sending out small personal gifts to my family and friends - and if you can't be with someone in person to share the holiday, the next best thing is a cd full of family photos, favorite recipes, video clips from your favorite moments this past year, or simply recording an "I love you" from each family member.  But rather than send a boring, ordinary cd case, why not dress it up a little?  Go ahead - add a little bling!  And pretty paper!

The very simple details for making this are on the PS Blog.  My tree, snowflake and envelope on the inside cover were all cut out with my Silhouette Cameo, using cutting files designed by my favorite, LORI WHITLOCK.  My papers were from the Holly Jolly line by MY MIND'S EYE- an oldie but a goody that I found sitting (still packaged) lonely and forgotten on a shelf in my craft supplies closet. The MME site says it's been discontinued and is no longer available, but they obviously have never looked inside my craft closet!

Here are a couple more pics:

 
...and the inside cover, which I kept simple with a tag containing a personal note.

That's it for me.  But be sure to check back Thursday, when I will be back with a fun holiday-themed layout using a sketch from one of my favorite sketch sites.  Until then...

Happy Christmas Crafting! [Only 21 days left - yikes!]

Tuesday, July 17, 2012

A Lori Whitlock Wheel Card and Favor Box


I love celebrating birthdays with family and friends!  And, to me, nothing says "I am thinking of you" more perfectly than a handmade card or gift - especially ones made using LORI WHITLOCK'S files.

I don't know about you, but when I was little I used to love cards and pop-up books with little wheels on them that you could turn.  So, when I saw that Lori was designing wheel cards, I knew I wanted to make one; and what better time than a friend's birthday?!  Paired with this sweet little favor box, I had the perfect way to tell my friend I was thinking of her on her special day.

I want to start by showing you this favor box because it's one of the newest items in Lori's SHOP. 


At 2x2 inches, this SCALLOPED BOX is the perfect way to dress up party favors or a wonderfully cute way to wrap a pair of earrings, which I have done!  It took literally less than a minute to assemble, and it's so cute!  I used Echo Park's Hello Summer papers (designed by Lori, of course).  I dressed up my scalloped edge with a little bling and added a butterfly in place of a bow (that I cut out twice and layered) from Lori's RELAX SUMMER IS HERE files.

My card was also super easy to make!


To make this card, I used a combination of papers from Echo Park's Hello Summer and Dots and Stripes collections.  Those super cute flip flops that I LOVE and have been using a lot on my cards and mini-albums lately are from Lori's DON'T BOTHER ME files.  I just added a little bling to the flip flop straps - much like the staps of my flip flops in real life! Aren't they cute?


And that fun wheel on my card?  This is what it says:


That's it for me today.  What about you?  Have you been crafting more or less now that summer's here?  Is there any project you are really excited about working on?

Sunday, July 8, 2012

My Improvised Heidi Swapp Memory File

I was sitting around the house yesterday morning, feeling to urge to create a mini-album using a few of the several hundred pics I took on our recent vacation.  But I wanted to do something a little different.  I had seen Heidi Swapp's Memory File system online and loved the concept, but I had never seen the actual file folders in my favorite scrapbooking store (I really need to have a chat with whoever orders the merchandise there!).  "That's fine," I said to myself, "I'll improvise."  And that's exactly what I did.  First, I found a (rather beat up) blue file folder that I had previously used to bring home work documents. Then, I dusted off my Silhouette and pulled out my Echo Park Paradise Beach Papers, my paint, my markers, and different bits and pieces from about 20 different manufacturers.

The concept of the Memory File is pretty easy.  It's an alternative to a mini-album in that you can create small flip albums or pocket folders to hold a collection of pictures and journaling (always important to me).  When opened, my memory file album looks like this:


The stickers included in the Paradise Beach paper pack made it super quick and easy for me to create this little cluster:


I created a pocket behind my main picture by sewing the paper I used for matting my picture to the paper cut out in the shape of the file folder.  The pocket was sewn on before the file-folder shaped paper was glued down to the folder.  It was the perfect size for holding extra journaling and a tag!


My flip album was super easy to make.  I started by cutting out four of Lori Whitlock's mini-album shapes.  Then I layered them along the back of the folder starting from the bottom and working my way up.  They are perfect for adding smaller photos, or even hidden photos or personal journaling that you may not want everyone else to see.  For me, it just means I can add one extra thing. Ha!


I used the "second page" to add even more journaling about our road trip to Florida, along with a few little pictures taken with my phone.  These are pictures that may not have normally made it into a mini-album or onto a layout, but I had plenty of room here!


I loved using my Silhouette Cameo and Lori Whitlock's adorable files to create this little car!  (Note: I also used Lori's files to create the palm trees and the sun on the front of my Memory File.) To add extra dimension, I created the tires from black buttons and circle-punched pieces.  I then added a Heidi Swapp journaling tag so that I could squeeze in just a little more additional journaling!  


That's it for today.  Before I sign off, I wanted to ask, is this something you would like to see a video tutorial for?  I could definitely see making more of these, so let me know!

Tuesday, June 26, 2012

It's a Lori Whitlock Blog Hop!


Greetings from sunny Florida where I am on vacation!  Yep, we gathered up the youngest two in our brood, stuffed  loaded them into our overpacked vehicle and headed east on I-10 for about 10 hours to get to the land of sunshine, endless beaches, and white sand.  Even on vacation, though, I like to send out cards with a personal touch - a post card of Big Al's Gator Farm just isn't for me.  So...(insert sound of record screeching to a stop)...

Wait a minute!  First, let's talk about Lori's wonderful blog hop.  She has been up to some super exciting stuff lately, and we are celebrating - yippee!  Now, you should have arrived from JOY'S BLOG. Don't you love her condiment caddy?  If I could have fit one more thing in our car, I probably would have asked Joy to let me borrow it for our trip - it looks perfect for a little picnic!  If you are just arriving and want to start at the very beginning, click HERE.

Lori has had so much wonderful news to share with us lately - she has launched her new and improved shop, she has terrific new cutting files almost every day it seems, and she has teamed up with Jessica Sprague to offer us digital designs, too!  And to celebrate all this funliness - that's right, I said funliness - Lori is offering YOU this awesome free file available for download today only.  I love it when people celebrate something by giving US free goodies, don't you?


Now, back to my project - instead of sending those postcards of Big Al's Gator Farm, I like to send quick personalized cards.  Lori has quite a few suh-weet summer files out to choose from, but I really fell in love with her bathing suits on a clothesline - it's simple, it's cute, and it's FUN. 


I initially started just making the first card using Lori's clotheline swim suits file (I layered my twine over her clothes line) - my card was quick and easy to make, so I "mass-produced" it and plan to insert a few vacation pictures before sending to a few family members and friends.


As I was cutting my bathing suits, I realized I also had the perfect card idea for a dear friend of mine who is having a birthday.  She marches to the beat of her own drum, no doubt about it, and a ordinary card simply would not work!  So, I came up with this quick, fun card - the inside says, "Happy Birthday to a true original!"  Pretty clever, huh? 

That's it for me today - the beach is calling my name and I can't stay inside a second longer.  Don't worry though, Lori is having a sale on her new shapes in the SHOP, and there are so many fabulous new files for you to check out! I can't wait to play with them when I get back!


Your last stop is LISA! I know you are going to love what she made!  Happy crafting!

Monday, June 18, 2012

Funky Mixed Media (using Lori Whitlock)

Happy Monday everybody!  I was looking at Lori Whitlock's cutting files, which are all so wonderful and perfect for everyday home decor and projects.  But, this time, rather than doing the "usual thing" I decided to challenge myself and do something a little different (that I have been wanting to do for a LONG time) - a mixed media canvas.

First, since I didn't have a clue where to start (other than by looking at all the great projects on Pinterest), I let my fingers take me over to Youtube where I found a very helpful TUTORIAL on how to make a background on my Canvas. 

Next, I headed over to Lori's STORE, where I found her Summer Icons and Water Titles files, which were exactly what I needed for my mermaid art.

After I Gessoed and painted my background, I applied a Gel Medium to the backs of my shapes and stuck them in place.  I then brushed more Gel Medium over the tops of my shapes; it dries clear so I didn't have to worry about the vibrant colors of my papers getting diminished one little bit.    I used American Crafts papers this time because I wanted something super bright that would match my daughter's room.


My mermaid was a LOT of fun to make!  First, because I DO NOT DRAW WELL AT ALL, I found a simple image of a mermaid that I converted to black and white and printed out.  Next, I cut out a picture of my youngest child's head, and I simply glued it on top of the mermaid.  I wanted her tail to have scales so I used my paper hole punch and punched and punched and...punched some more.  Then I layered and layered and layered until I got just the right look I wanted.  I painted in spots around the body to help blend it into the painting.  The crown was hand-drawn (about the extent of my drawing skills) and added last.  Here's another close-up of the tale - because it took me for-ev-er to do...


And here are some close-ups of Lori's files that were used on my canvas...


And that's it for today.  Now it's your turn.  Go ahead - take a chance - do something you've never done before!  Go on!  I dare you!

Tuesday, May 29, 2012

Lori Whitlock End of School Projects


It is the last week of school in our neck of the woods, and that means making little gifts for favorite teachers and besties.  As always, Lori Whitlock makes that process easy - in fact, the hardest part is having to make a decision as to which cutting files to use - never a simple task when she has so many wonderful designs to choose from!

I chose to make small flower arrangements as well as little purses and boxes to hold treats and gift cards.

I fell in love with these small SCALLOPED EDGE PURSES as soon as I saw them in Lori's STORE.  The purse is cut as one piece, with fold lines that make it a snap to assemble.  Of course, I used ECHO PARK'S Hello Summer Collection (designed by Lori), which I thought to be quite fitting for end-of-school gifts!  To decorate this purse, I used Lori's Star tickets and Pinwheel files (which I L-O-V-E and plan to use again this summer!).


I made this purse a little over an inch larger than the original design so that it would be large enough to hold gift cards, which always seem to be a hit.

The original size purse looks like this, and I used it to hold some yummy skittles.  To decorate it, I used a brad from the Hello Summer Collection, a butterfly from the sticker sheet that comes with the paper pack (I just added a small pop dot behind it), and a flower banner from Lori's files.

The vases of flowers have Lori's cutting files used to decorate the small mason jars (Hello Sunshine Phrase, Dragonfly, Scalloped Oval), and her shapes are also glued to small bamboo skewers and inserted in the bouquets (Pinwheel, Sun, Bird Flourish).  The "Sweet Box" is actually designed to hold Snickers bars, and the file includes an optional wrapper to go around the candy bar.  I decorated mine with Lori's "You're Sweet" phrase and left off the "you're" on my project.  I also used the little star shapes left over from my star tickets to decorate the front.  


Because it is already so hot here in sunny Texas, I decided not to use chocolate.  Instead, I simply filled my box with more Skittles.  I don't think I will get any complaints!


That's it for today, but be sure to stay tuned as Lori and the gang (me, too!) will be having another blog hop to kick off the summer in just a couple of weeks!  Details to come!