Tuesday, April 30, 2013

Pretty Little Studio/Love My Tapes Blog Hop!


Hello and welcome to the Pretty Little Studio and Love My Tapes Blog Hop!  We thought it would be fun to combine forces and share with you projects highlighting Pretty Little Studio whimsical goodness paired with the versatility and trendiness of Love My Tapes.

During the Blog Hop, you will be visiting blogs from both PRETTY LITTLE STUDIO and LOVE MY TAPES Design Team members.  We promise to bring you a hop FULL of inspiration and creativity!

And what's a blog hop without give-aways?  Be sure to visit all the blogs, including the Pretty Little Studio and Love My Tapes blogs for a chance to win some PLS and LMT goodies!  When visiting the Design Team member's blogs, be sure and leave comments as many of the Design Team members will also be hosting their own Blog Hop giveaways.

The Hop will start on the Pretty Little Studio blog and end on the Love My tapes blog, so head on over to the Pretty Little Studio BLOG if you are just joining in.  We will announce the winners of the PLS and LMT giveaways on May 3rd, so be sure to be watching for the announcements.  If you get lost along the way, just check below to get you hopping in the right direction.
 
Here is the complete list:
 
Annette Allen: http://myclevercreations.blogspot.com/
Annette Witherspoon: http://www.aspoonfullofsugarcrafts.blogspot.com/
Ashley Horton: http://www.ashleyhortondesigns.com/
Candice Elliott: http://truedivinehand.blogspot.com/
Christina Collins: http://dontworry-bescrappy.blogspot.com/
Heather Adams: http://craftyscrapbooker.blogspot.com/
Janice Whiting: http://www.janiceaileen.blogspot.com/
Jenni Calma: http://www.papercardinal.blogspot.com/

Krissy McKee: http://krissyclarkmckee.blogspot.com/  (that's me!)

Lisa Spiegel: http://lisaspiegel.typepad.com/my_weblog/
Lisa Wilkinson: http://www.createfor7.blogspot.com/
Mary Ann Jenkins: http://www.maryannjenkins.com/
Missy Whidden: http://littlenuggetcreations.blogspot.com/
Penny Smith: http://www.pennysmithdesigns.blogspot.com/
Tina Walker: http://adogslife-thirteen.blogspot.com/
Missy Whidden: http://littlenuggetcreations.blogspot.com/
 
Now, you should have just arrived from Jenni Calma's blog HERE.  
 
Okay, let's get hopping!
 
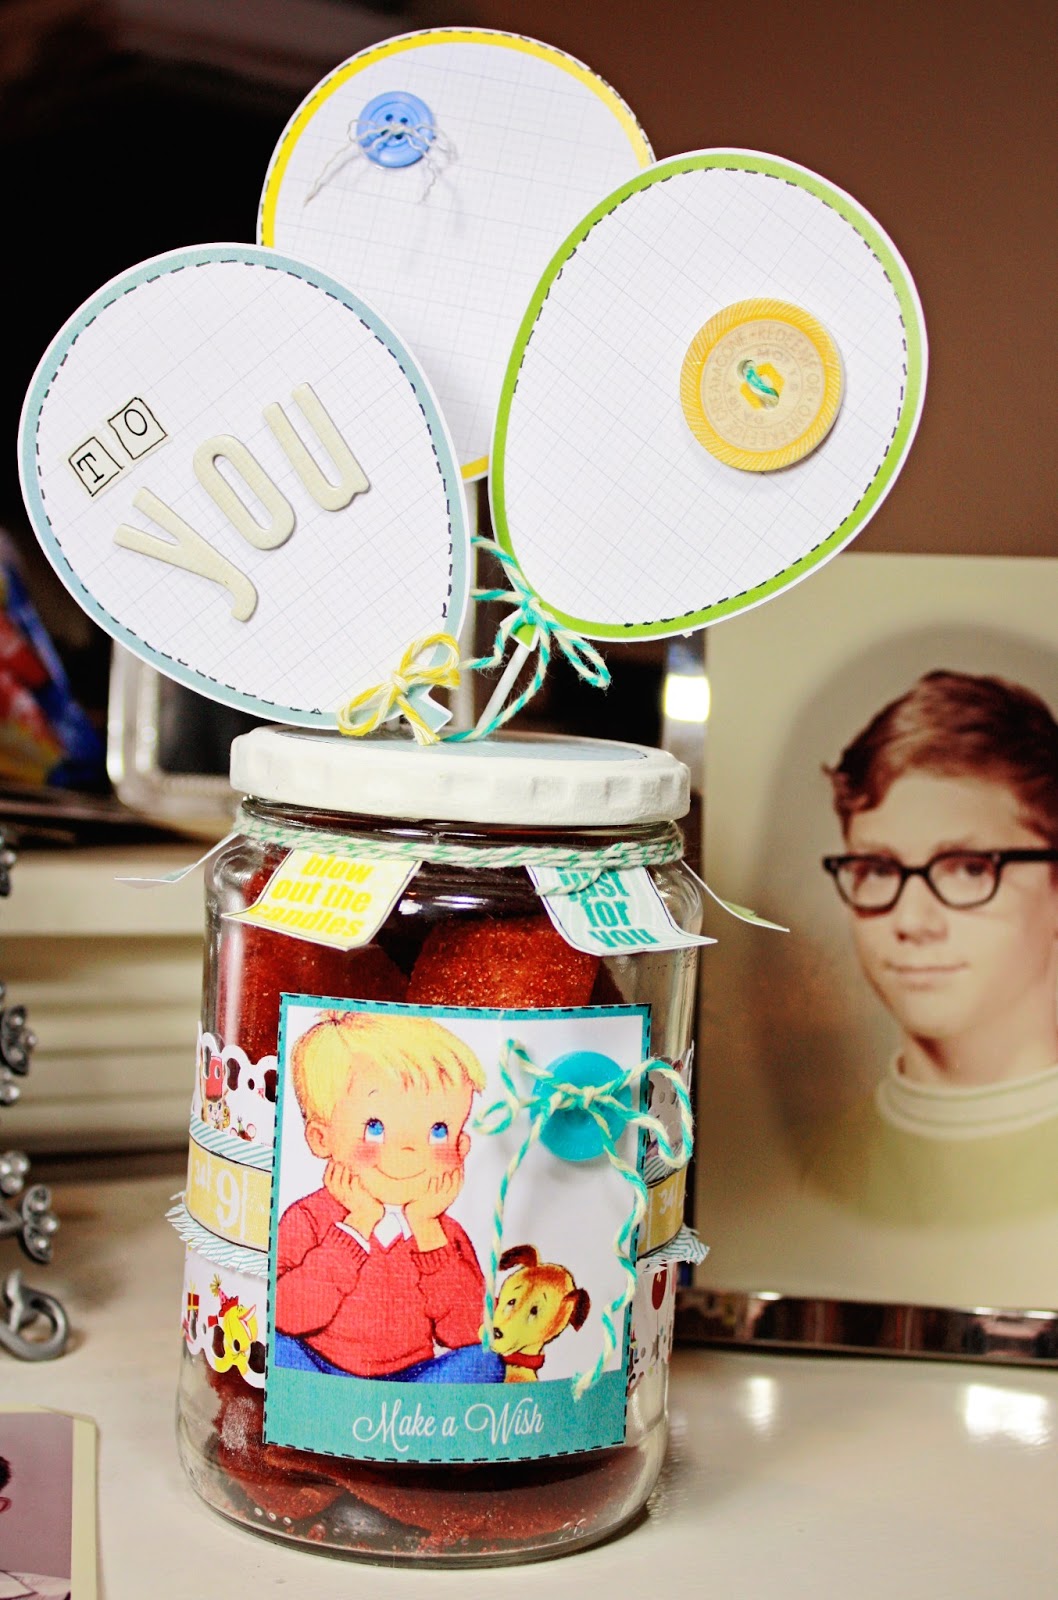
Here is a quick little layout I did starring my youngest smart girl, who was just inducted into the National Junior Honor Society!  

 
I have never been a huge tape user - before now.  The LMT products that I was given were so easy to use and extremely versatile.  I matted my layout with the tape, I made a photo corner with my tape, I adhered it to dark cardstock to make a banner, and I adhered it to white card stock and punched stars.  When you combine that with my PLS papers which I discovered a while back can be used on ANY and EVERY type of layout - well, it's "so fab" - just like my girl! (no I could not resist!)

A little close-up:

I think the Love My Tapes banner that I made and the Pretty Little Studio title created using papers from the Birthday Cake Collection go pretty well together!

I am loving all this loveliness, and to celebrate the "fabness" of it all - I am giving away a $10 gift card on May 4th to Pretty Little Studio's Store to some lucky person who leaves a comment on my blog and the PLS BLOG and the LMT BLOG.  That's right, leave a comment on all three blogs by the end of the blog hop and you could win a gift certificate to the wonderful online store that started my love affair with all papercrafting things vintage!

Okay, that about wraps it up for me.  Next on the list is Lisa Spiegel who can be found right HERE!


Tuesday, April 16, 2013

Almost 13 - Pretty Little Studio Sketch Challenge

Are you ready for another sketch challenge? You are?! Well, then check out Keri Babbit’s wonderful sketch up this week at PRETTY LITTLE STUDIO!


Keri’s sketches definitely fit what one of my friend’s has called my photocentric style. And I love the way my Pretty Little Studio papers and ephemera “fit” this layout of my moody, pouty soon-to-be teenager. Those bright, cheerful patterns are the perfect contrast to the photos of whom I shall now refer to as “The Sullen One.”

To further draw the eye to my photos and the story I am telling in not so many words - I used a plain white cardstock background, which was framed by additional layers of green and pink cardstock.


Instead of the two rows of circles and two rows of arrows that are in the original sketch, I chose to use three small rows of hearts (love that heart paper from the Birthday Cake Collection!), which are stair-stepped down and one row of large arrows that I created by fussy cutting one of my papers from the Hopscotch Collection. I machine-stitched and distressed the edges of my papers to add a little texture.


I also layered a couple of my Pretty Little Studio journaling tags along with one of my calendar cards, and I decided to sprinkle a few sequins across my page. Why? Because they seem to be trendy again and, hey, I like sparkly things!

The June pointer at the top of my photo is simply the top of my small calendar card that I cut off – that’s right, I made two pieces of ephemera for the price of one! I wanted my numbers to stay inside the border created by my paper so I overlapped the “3” and raised it with pop-dots so you could see both the “1” and “3” clearly.

And that is it for me today. Be sure to head over to the PRETTY LITTLE STUDIO BLOG to check out Keri’s sketch and see what the other ladies have come up with! And, of course, I would love to see what fabulous layout YOU create using this sketch, too!

Oh! Be sure to check back tomorrow. I made Mother’s Day Cards – I might even get them sent off in time this year – go me!!

Monday, April 15, 2013

Paper Secrets - Sketches with a Twist


One thing I love about PAPER SECRETS is that, not only does it have a sketch challenge twice a month, but each sketch challenge comes with a fun twist.  The April 1st twist was to use ribbon or trim on our layouts (and that's no joke - ha ha!).  This time, our twist was to use something wooden on our layout - perfect for me since I love and have quite a few wooden veneer shapes from Studio Calico, including these sweet bird shapes from the Paper Secrets SHOP that I added to my collection!
 
I do have a quick confession to make - this layout isn't quite finished yet.  What's missing you ask?  Well, I haven't added any journaling yet.  I know that I want journaling; I even know where I want it (right abot the owl and the ribbon) - I just don't know what I want to say yet.  No sweat, I figure it will come to me.  And when it does, I will have have a lovely layout ready to write it on!

Here are a couple of close-ups:

I fussy cut and layered until I had just the look I wanted.

I painted each of my wooden veneer shapes with white acrylic paint.  My title letters were cut out from one of my papers from ECHO PARK'S SWEET GIRL COLLECTION and outlined in brown marker to add more definition.
 
That's it for me this Monday morning; however, if you are wanting an additional beginning of the week boost, head over to Paper Secrets and check out the fantastic sketch that inspired my layout!

Thursday, April 11, 2013

Birthday Treat Jar - Pretty Little Studio


I'm b-a-a-a-a-ck - this time with a quick and easy (and totally adorable) project that you can use for an assortment of homemade gifts and goodies - for a friend, a favorite teacher, or even as a birthday gift for hubby!  That's my guy to the right, by the way, when he was a precocious 11 year old.  Come to think of it, he's still a precocious 11 year old, he just has an additional forty-something years added to his body!

I created this project for PRETTY LITTLE STUDIO,  using their fantabulous Birthday Cake Collection, as part of this week's OOTB Challenge.  It seems to be one of my overall favorite collections, with it's happy, brightly colored papers and tags.  My jar started out as a smelly old pickle jar (that I washed thoroughly, just in case you are wondering) that the Hubster (who loves all things pickled and smelly) had recently emptied out - and by emptied out, I mean he consumed a little bit of hamburger smothered in no less than half a jar of pickles!  So, it was only fitting that I converted that particular jar into a birthday gift for him.

My 8x8 paper wasn't quite wide enough to wrap all the way around my jar, so I cheated.  I cut two pieces and glued them together matching the patterns up at the connecting seam as much as possible.  My base paper was cut using my Silhouette Cameo.  I cut out the ruler from one of my sheets and glued it to a slightly wider blue base, which I then cut with scissors along the bottom to make a fringe.  Once everything was glued to my jar, I added this adorable "Make a Wish" Polaroid Diecut to the front using pop-dots for a little extra dimension.  A button with a little bit of twine glued to the front and the base of my jar was almost complete.

My next step was to add my sentiment tags around the neck of the jar.  I adhered them, evenly spaced, to the neck of the jar and simply wrapped a piece of baker's twine around everything a few times.  

My last step was to decorate the lid.
First, I painted the top white.  After it dried, I traced out the circle onto a piece of my paper, which I then cut out and glued to the lid.  I sneaked into the garage, where I found my husband's drill - just sitting there, looking unused and unloved.  I drilled three holes into the lid of my jar, using the smallest bit I could find.  Then I simply put a toothpick through each hole and glued a balloon journaling tag to each toothpick.  Note: I added Glossy Accents to each hole before inserting my toothpicks.  Because Glossy Accents hardens to a cement-like consistency, there was no chance my toothpick-based balloons would come undone - something that is very important since the balloons are on a functional lid which will be repeatedly taken off and put back on to get to the treats inside, if I know my husband!  A little more baker's  twine, a couple of buttons, a few letters, and I was done!  The only thing better than a project coming together with no hiccups is a project that quickly comes together with no hiccups.  Much of that was due to my wonderfully coordinated PRETTY LITTLE STUDIO supplies, which all seem to go together perfectly!

And now that it is finished and was presented with much fanfare to my guy for his birthday, I can tell you that Hubsy LOVES his treat jar!  Okay, maybe he really just loves the goodies inside the jar, but he is smart enough to make the appropriate appreciative sounds about the jar itself.  *smile*

To view this week's inspiration and the other fantastic projects completed by our Design Team, head over to the Pretty Little Studio BLOG.  You are going to LOVE what you see - I just know it!

Wednesday, April 10, 2013

Happy Birthday, Honey Bunny

 
Today is the Hubster's birthday.  I can't tell you how old he is without him divorcing me, but let's just say he is at the "distinguished-looking" age.  And if you guessed "distinguished-looking" appears to be about 59 years old - well, you just might be correct!  I won't tell, though!  No matter - he is handsome and kind and wonderful.  I wouldn't trade him for anything, and I thought today was the perfect day to tell my honey-bunny exactly that.  And, of course, I posted it all to PRACTICAL SCRAPPERS where I am up today (but don't worry, I didn't tell them my man was 59 either).
 
Here is my layout:
 
 
I used more of my MY CREATIVE SCRAPBOOK kit that I received as one of the April Guest Designers.  So far, I have created 3 layouts and 3 cards using the main kit, and I STILL have stuff left over!  That's a pretty awesome kit if you ask me!
 
 
I had fun adding these layers.  I started with a border of my yellow paper that I made using my Silhouette Cameo.  Then I sewed a layer of lace on top, making sure to leave the bottom tips of the yellow border exposed.  My last step was to sew these adorable "LOVE" tags on top of everything.  I couldn't resist adding a heart button!
 
And I love this little cluster.  I layered, adding pop dots to some parts for increased depth, until it was j-u-s-t right. 
 
 
Finally, here is the card I made - simple, yes.  But perfect for my best (and only) guy!
 
 
That's it for me today, but I will be back tomorrow to show you a homemade birthday gift I made for my man.  It was simple, it was easy, and it is SUPER cute!  Stay tuned...
 
In the meantime, go check out all the cool stuff going on at PRACTICAL SCRAPPERS, like these ideas for using TWINE or SEQUINS.  That's right, I said sequins!

Thursday, April 4, 2013

My Creative Scrapbook - April Guest Designer!

I am one of the Guest Designers this month for MY CREATIVE SCRAPBOOK - a kit club run by the very sweet Pam Rangel and Delaina Burns.  Delaina is also one of the designers, and I have been a fan of her work for years.  In fact, I am pretty certain that I scraplifted one or two of Delaina's layouts (making sure to give her credit, of course) when I was first learning different styles and trying to figure out what mine was.
 
The MCS KIT CLUB has several different options and add-ons that you can purchase.  I was provided with this month's main kit, which was full of Crate Paper goodies that I am absolutely enamored with!  I had so much fun creating these two cards and two layouts, and I still have sufficient leftovers to get at least another layout and couple of cards done - a very generous kit indeed!
 
Here is a close-up of my Trending Now layout - can I just say it again?  I l-o-v-e Crate Paper:
 
And here is the second layout I created, featuring my sweet Lula-Bug.  I {heart} the Chevron background paper so much, I am going to have to get some more.  I NEED it - like maybe 10 sheets of it!!!!
 
Another close-up.  As you can see, I became a little obsessed with all the butterflies included in the kit - don't judge.  A quick little handmade pennant and a doily fussy cut from one of my papers, and I had this cute cluster (and the perfect place for my journaling):
 
I even got brave and made a couple of cards.  They are nowhere on the scale of CATHY HARPER or ALISSA WELLS (my card heroes...heroines???...the ladies who rock the cards, how's that?) - but you really can't go wrong with a kit full of Crate Paper goodies, now can you?
 
This is the first card that I made (yep, more butterflies were used):
 
...and my second creation - a simple everyday card that I quite like.  (I think I need about 5 or 6 extra sheets of that bird paper - it makes me happy just looking at it)  And, look!  I used a bird instead of a butterfly this time!
 
That's it for me.  But, if you want to enjoy some awesome Thursday eye candy (completely calorie free), head over to the MY CREATIVE SCRAPBOOK DESIGNER'S GALLERY.

Wednesday, April 3, 2013

Birthday Crown - Pretty Little Studio

 
I am up on the PRETTY LITTLE STUDIO BLOG today with a fun tutorial on how to make this birthday crown.  How did I come up with the idea, you ask?  Well, last year, my oldest baby and I were at Party City, where she saw a crown that she just had to have for her birthday.  Of course, I got it for her but I vowed that the very next year I was going to make her a bigger, better crown.  And that is just what I did!  Here is my kalliebeth last year wearing her cute but average-looking crown:


And here she is this year wearing the birthday crown her very proud mama (that's me) made for her:


The crown was extremely easy to make, and it turned out so cute using various collections by Pretty Little Studio.  The supply list and tutorial are on the BLOG, along with wonderful close-ups like this one:

Hope to see you over there!

Monday, April 1, 2013

Nature Walk Blog Hop (Pretty Little Studio)!


Happy Monday and welcome to the Pretty Little Studio Nature Walk Blog Hop, where we are celebrating the reveal of a fabulous soon-to-be-released collection - Nature Walk - full of the cutest, vintage-inspired flora and fauna you could imagine!  If you thought the recently released Birthday Cake Collection was a huge hit, I am telling you the Nature Walk Collection is going to be a home run!!!

***IF YOU ARE HERE TO SEE WHAT I MADE WITH GOODIES FROM PAPER SECRETS, SCROLL DOWN TO THE NEXT POST.***

Now, you should have just arrived here from HEATHER'S BLOG.  

Head on over to the PRETTY LITTLE STUDIO BLOG if you are just joining in and want to hop all the way through.  Or, if you should have made a right turn in Albuquerque - for those of you who grew up on Bugs Bunny cartoons like I did - here is the complete list:

                 Aimee: http://aimeesarmoire.typepad.com/
                 Candice: http://truedivinehand.blogspot.com/
                 Christina: http://dontworry-bescrappy.blogspot.com/
                 Heather: http://craftyscrapbooker.blogspot.com

                 Lisa W: http://www.createfor7.blogspot.com/
                 Lisa S: http://lisaspiegel.typepad.com/my_weblog/
                 Mary Ann: http://www.maryannjenkins.com/
                 Penny: http://www.pennysmithdesigns.blogspot.com/

I have had so much fun playing with Pretty Little Studio's collections lately, which are FULL of unique ephemera and wonderfully coordinated papers that you just won't find anywhere else.  And even though Pretty Little Studio goodies are vintage inspired, they are extremely versatile and can be used for any style of scrapbooking and card making - such as this layout I recently created for a PLS sketch challenge using the Sandcastle Collection (one of my favorites):


Pretty, right?  Would you like a chance to win your own Pretty Little Studio  loot, I mean, products so you can make your own pretty little creations?  You would?  Well, you are in luck because we are having a giveaway!  That's right, one lucky person will win a $20 Gift Card to the Pretty Little Studio Shop!  The best part is, you don't have to kill the bad guys, or lift heavy weights, or run 10 kilometers.  In fact, you don't even have to leave your chair!  For a chance to win, all you have to do is: 
 
1.      Follow Pretty Little Studio’s BLOG;
2.      Like Pretty Little Studio on FACEBOOK;
3.      Leave a comment here letting me know what Pretty Little Studio item you like the most or would like the most if you had a $20 gift certificate burning a hole in your pocket!
 
That's it for me today.  Next up on the hop is my good friend, LISA W - I just know she is going to have some awesome inspiration for you!

Okay now, hop along now - get moving.  Don't need anyone getting any hare-brained ideas about hanging out around here all day...

It's No Joke - I am the Paper Secrets Guest Designer!


It's no secret, I do enjoy playing along with the challenges over at PAPER SECRETS.  So, when the ladies over there asked me to be their April Guest Designer, I was more than happy to say yes!  And when I saw all the wonderful goodies they sent me from their store, I was even more happy that I said yes!  You know me, I research things - that's a large part of what I do for the job that brings in the steady paycheck.  And this is what I found out about Paper Secrets:

1.  They have a very nice selection of the newest collections out there;
2.  If you play along with their challenges, you can win a gift card to their e-store (that's free money);
3.  They have great shipping rates; and - saving my favorite for last...
4.  You can shop in your pajamas and the store is never closed!!!  Yippeee!!!!!

So, what did I get from Paper Secrets this month?  I got the Echo Park Sweet Girl Collection, which I used to create this layout, using the April Sketch and the twist to use ribbon or trim:

 
I LOVE that this collection contains a varied combination of papers, such as these bold graphic chevrons and vintage-y flowers.  With the sketch and all the pretty papers and sticker sheets (and with a little help from my Silhouette and sewing machine), this layout practically put itself together!

Here are a couple of close-ups:


I used this trim that reminded me of a tutu.  It reminds me of Lula's dress-up outfits, so it was perfect for this layout that features her.


I also love the look of doilies added to layouts.  However, to keep my paper from getting overly bulky and weirdly wrinkled from having a chunk of doily tucked under it - I cheat.  I cut the tucked under part off and just tuck the very tip of the remaining portion under the edge my paper.  This gives me the illusion of an extra layer without the additional bulk.

That's it for me today.  Be sure to check back on the 15th, when we will have another sketch reveal!

***NOTE, IF YOU ARE LOOKING FOR THE NATURE WALK BLOG HOP, IT IS THE VERY NEXT POST ABOVE - CHECK IT OUT!"